10 Must-Know Camera Settings for Beginners (That No One Tells You About)


Many beginners feel overwhelmed by all the buttons and options on a camera.
If you’ve ever stared at your camera wondering what half the buttons even do, you’re not alone.
Getting started with photography can feel like learning a new language—but once you understand the basics, everything starts to click.
Here are 10 camera settings every beginner should know—and trust me, some of these are the kind that even YouTube tutorials forget to mention.
- 1. ISO – Mastering Light Sensitivity
ISO controls how sensitive your camera is to light. A low ISO (100–200) is great for bright days, while a higher ISO (800+) works in low light. But be careful—too much ISO can make your photos look grainy.
- 2. Aperture – The Gateway to Depth & Blur
Aperture affects how much of your photo is in focus. Want that dreamy background blur (called bokeh)? Use a wide aperture like f/1.8. Want everything sharp, like in a landscape? Go narrow, like f/11.
- 3. Shutter Speed – Capturing Motion Right
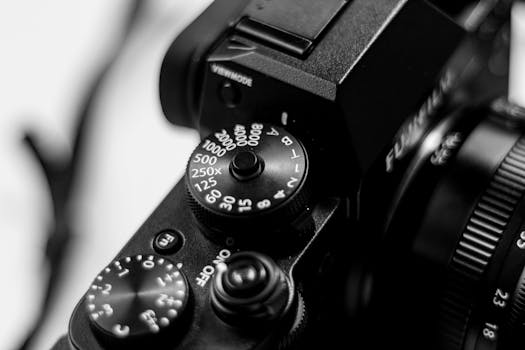
A fast shutter (1/1000) freezes action—perfect for sports or fast-moving subjects. A slower one (1/30) can create beautiful motion blur—think waterfalls or night traffic trails.
- 4. White Balance – Keeping Colors Natural
Your camera guesses the color temperature of light. But it doesn’t always get it right. Choose settings like “Daylight,” “Shade,” or “Tungsten” to make your colors look real and vibrant.
- 5. Focus Modes – Auto vs. Manual Explained
Auto-focus is your best friend, but manual focus gives you full control. Try manual when shooting close-ups or in low light—especially when your camera keeps focusing on the wrong thing.
- 6. Metering Modes – Understanding Light Exposure
Metering helps your camera decide how bright or dark a photo should be. “Matrix” or “Evaluative” is a good all-rounder, but “Spot” metering helps when your subject is lit differently than the background.
- 7. Image Stabilization – Say Goodbye to Blurry Shots
Built-in stabilization (in the lens or body) helps reduce blur from shaky hands. Turn it on when shooting handheld—but turn it off on a tripod to avoid weird jitter.
- 8. RAW vs. JPEG – Choosing the Right Format
JPEG is easier and takes up less space. RAW gives you way more flexibility when editing. If you want the best quality (and plan to edit), go RAW. Your future self will thank you.
- 9. Custom Presets – Save Your Favorite Settings
Once you find your go-to combo of settings, save them as a preset. That way, you’re always ready to shoot without fiddling around.
- 10. Histogram – Your Secret Weapon for Perfect Exposure
This graph shows if your photo is too dark, too bright, or just right. If everything is bunched to the left—too dark. To the right—too bright. Centered? You’re golden.
Conclusion
Understanding your camera settings is the first step toward taking photos you’re proud of. Don’t worry about getting it perfect right away—experiment, make mistakes, and learn as you go.
Every pro was once a beginner.
Got a setting that still confuses you? Drop it in the comments—we’re here to learn together!


